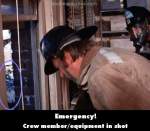
Visible crew/equipment: After Roy tells Jason that he has time to pop up to the orthopedic ward because it's Johnny's turn to cook, when Roy heads out receiving we can see the top of the set over treatment 1, right behind Johnny.
Visible crew/equipment: When Squad 51 arrives at Homer's house, we can see the outlines of the mic transmitter and wire on the back of the old cowboy's shirt.
Heavyweight - S3-E5
Visible crew/equipment: When the guy is stuck in the tree after his hang gliding accident, John ties the rope around the branch and begins to saw the branch while Roy uses that rope to slowly lower the branch. The problem is that just as the branch nears the ground, we can see the production crew's thin double lines securing the branch at the top right of the screen, and then those lines vanish when Roy joins John.
Heavyweight - S3-E5
Visible crew/equipment: When Roy and Johnny are with the guy who got stuck in the tree while hang gliding, the outlines of the mic transmitters and wires are visible on the back of the victim's sweater and also the back of Johnny's shirt as he saws the branch, and then carries the victim to the Stokes.
Heavyweight - S3-E5
Visible crew/equipment: When Roy and Johnny are with the man who was injured by a gunshot, Johnny goes across the street to treat the stabbing victim, and just as Johnny and the others enter the living room, the shadow of the moving boom is visible on the wall to the right.

Visible crew/equipment: When Chet, Roy, and Johnny are with the mother and child at the scene of the vehicle accident, the reflections of location set array lights, four side-by-side reflector screens with some crew members holding them and the camera/cameraman are all visible in the window and surface of the funeral home hearse, as it arrives and then pulls to the side of the road.
Visible crew/equipment: When ready to transport the teenagers from the crash, the bulging outline of the mic transmitter is visible on the back of Roy's shirt, when Roy tells Captain Stanley they're ready to go. The outline of the mic transmitter is visible on the back of Johnny's shirt, when he looks for his HT and is bitten by the rattler.
Visible crew/equipment: At the start of the episode, in the closeup shot of Roy, Chet, and Johnny as they're talking about not catching any fish on their trip, there is a chrome spotlight on the roof of the Land Rover, and we can see the reflection of the camera mounted on the vehicle's hood.
Visible crew/equipment: After Roy, Johnny, and Chet find the victims of the vehicle accident, when Johnny checks on the boy's mother, the bulging outline of the mic transmitter is visible on the back, right side of Johnny's red shirt.

Visible crew/equipment: During the structure fire, Johnny and Roy rescue the security guard, and when Roy breaks the window with the chair, we can see a couple of crew members, equipment, and lighting on a c-stand outside down below.
Visible crew/equipment: When Squad 51 is heading to 1511 West Hill, responding to the attempted suicide, in the closeup of Roy and Johnny en route, we see the reflection of Squad 51 as they're driving past houses/stores on Johnny's side. Just about as Roy says, "It should be it over there," in the reflection we see two crew members riding on the squad - one on top of the squad, and the other one standing on the back.
Visible crew/equipment: At the structure fire, after the security guard is safely down the ladder, Johnny follows him as Roy watches from the window, and when the fire flashes through the doors, we can see the hand of a crew member pushing the lower boxes causing them to tumble.
Visible crew/equipment: After Roy breaks the window with the chair, the guys place the ladder against the window and Marco starts to climb up. In the next interior shot, just as Roy and Johnny lift the security guard, right outside the window we can see the corner of something else (platform-like), besides the top of the ladder.
Visible crew/equipment: When Squad 51 arrives at the second location, 1511 East Hill, trying to find the correct address for the attempted suicide, the outline of Johnny's lav mic transmitter is visible at the back of his shirt.
Visible crew/equipment: While Early is listening to the heartbeat of the boy with a heart problem, Dixie is standing beside him, and on the glass case behind them we can see movement in the reflection, even though it's only the three of them in that treatment room.
Visible crew/equipment: During the structure fire, when Roy, Johnny and the security guard are in the upstairs room and Roy closes the doors, just as they start to walk toward the window, the moving shadow of the cameraman and camera are visible on the wall. The shadow is not moving in sync with the guys so we know it's not theirs.

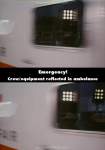
Visible crew/equipment: When Roy and John are in The Boat with the victim of the explosion, the ambulance arrives and just as it passes by we are able to see a nice reflection of crew members, location set's 9-bank array lighting, reflector screens, a ladder and other equipment.
Visible crew/equipment: After Squad 51 is dispatched to the 'heart attack' at Compu-Data, when Johnny and Roy walk in and then approach the victim in the office, the reflection of the moving camera dolly is visible on the office's large panes of glass. The camera equipment also casts a shadow on the three men as they walk toward the office, then on the glass as it moves back and forth.
Visible crew/equipment: At the gravel pit, when Roy jumps onto the conveyor belt to reach for the trapped little boy, the outline of the bulging mic transmitter is visible on the back of Roy's shirt.
Visible crew/equipment: After Johnny and Roy arrive on scene with the man trapped behind the semi, when they both put down the splints and drug boxes, the bulging outlines of the mic transmitters are visible on the back of their shirts as they bend over. Then, when Roy leans over to check on the victim, the outlines of the mic transmitter and wire are visible on the back of his shirt.


Answer: I was rewatching a few first season episodes of Charlie's Angels (1976), and in S1xE6 "The Killing Kind," I recognized the same actor. So, to finally fully answer your question, the two baseball players in School Days are played by Rod Perry and Sean Fallon Walsh.
Super Grover ★