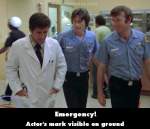
Fair Fight - S6-E5
Visible crew/equipment: At Rampart, when Dr. Bracket, DeSoto and Gage are discussing the Hubbards while walking down the hall, two T-marks become visible on the floor behind them when they turn the corner.
Fair Fight - S6-E5
Visible crew/equipment: While John's trapped with the two men in the cave-in, he digs and finds the opening to the pipe, and when he starts shouting up to Roy, the cameraman's knee/leg is right beside John's left hand, at the lower right corner of the screen. It really is.
Fair Fight - S6-E5
Visible crew/equipment: After Roy and Johnny get back to the station the other guys tell them to check the dog to see if he's sick, and when Roy checks Henry's pupils and Johnny checks his pulse, all the guys are standing behind Johnny and Roy., and we can see the shadows of crew movement in the kitchen at the top right corner of the screen.
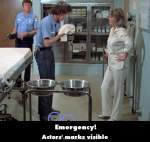
Fair Fight - S6-E5
Visible crew/equipment: After the cave-in rescue, when Dixie, DeSoto and Gage are in the ER, Gage washes his face and as he comments that he wasn't cut out to be a mole, two tape marks are visible at his feet.
Fair Fight - S6-E5
Visible crew/equipment: When Johnny and Roy get back to the station and walk into the day room, right after Marco says, "Well, either he's sick, or he's the laziest dog ever lived," we can see the shadow of the boom mic moving back and forth across the top of the wall, on the right.
Fair Fight - S6-E5
Visible crew/equipment: At the cave-in site with the trapped men, when Johnny is up top and also when he's being lowered down to the men, the bulging outline of Johnny's mic transmitter is visible on the front, left of his shirt, right above his belt.
Fair Fight - S6-E5
Visible crew/equipment: When Roy and Johnny are at Rampart after their third run to the battling couple's home, the outline of the mic transmitter can be seen on the front, left side of Roy's shirt, over his belt.
Fair Fight - S6-E5
Visible crew/equipment: During the structure fire, when we see Engine 15 drive toward and then pass the camera, the large reflection of the location's array lighting is visible on the surface of the engine.
Visible crew/equipment: When Squad 51 is dispatched to 'man injured', in the exterior shot of the squad while en route, when the dispatcher cancels the run the reflection of the filming vehicle can be seen on the side of the squad.
Visible crew/equipment: When Station 51 is dispatched to an unknown type rescue, which turns out to be two people stuck on the side of a building, in the first shot of them the aerial camera tilts down and pans right to left, and as it does the reflection of the crane (supporting the camera) is visible on the building's glass siding, and the crane's outboard legs are also visible as the camera follows the squad into the lot.
Visible crew/equipment: After Early and Brackett do the tracheotomy, when Dix leaves treatment 4 and walks up the hallway, the outline of the mic transmitter and wire are visible on the back of her uniform top, and when she sees Johnny in the hallway, the outline of his mic transmitter is visible on the front of his shirt over his belt.
Visible crew/equipment: When Station 51 arrive at the movie studio, after the car's explosion Captain Stanley tells dispatch to respond another engine, mobile aid unit, and another ambulance. In the next shot from the interior of Engine 51, the cameraman and camera are visible in the passenger side mirror.
Visible crew/equipment: When Station 51 is being dispatched to 'auto accident with injuries' there's a closeup of Sam Lanier, the dispatcher, and in the next overhead shot of the apparatus bay, we can see the reflection/shadow of equipment moving on Engine 51's windshield, at the bottom left corner.

Captain Hook - S6-E8
Visible crew/equipment: After Station 51 is dispatched to "aircraft down," just as the squad and engine roll up on the scene, the reflection of the camera crane can be seen on Engine 51's windshield.
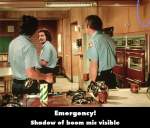
Captain Hook - S6-E8
Visible crew/equipment: When Roy, John, and Chet are standing near the stove talking about Hookrader's party, just as John tells Chet, "And you! You with that speech!" they walk towards the table, and the shadow of the overhead boom mic swoops across the cabinets on the right.
Captain Hook - S6-E8
Visible crew/equipment: When Marco is speaking with the deputy at the site of the wrecked chopper, the bulging outline of the mic transmitter is visible on the left side of his shirt, above the belt.
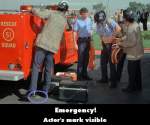
Visible crew/equipment: During the rescue of the two guys up on the scaffold, when Gage is putting on his pack and harness, an actor's T-mark is visible on the ground, which Captain Stanley promptly stands upon when he asks Gage if he has his handy-talkie.

Visible crew/equipment: At the scene of the scaffold accident on the side of the building, near the top of the crane, there is a small covered booth that hangs from the crane. We can see the reflection of the hidden second cameraman and his camera in the mirrored windows of the building, as he leans in and out of that booth to film some of the footage we see during this scene.
Welcome to Santa Rosa County - S6-E10
Visible crew/equipment: After Roy and John eat lunch with the sheriff and decide to head to the lake after lunch, when they both get into the squad car, we can see the reflection of the cameraman, who's wearing jeans and a dark shirt, in the wing mirror, as he walks closer to the car and bends down. We can also see the legs of another crew member standing behind him.
Welcome to Santa Rosa County - S6-E10
Visible crew/equipment: When Sheriff Bittner, John, and Roy are driving to the lake after eating lunch together, the bar for the mounted camera is visible on the driver's door, which is only seen in the interior shots of the car.
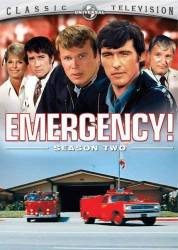


Answer: I believe you are speaking of the old man, Mr. Wilson. He's played by J. Pat O'Malley.
Bishop73
Correct, it was J. Pat O'Malley...he also played the grandfather with his grandson when their rocket exploded, and also played "Old Bill" in the episode with Ann Prentiss, where Gage saves the little girl from the burning tree house, and her mother falls in love with him.