Visible crew/equipment: When Station 51 is dispatched to the rescue on Johnson Canyon Bridge, just as Engine 51 rolls out of the apparatus bay, the reflection of array lighting and two reflector screens are visible on the engine.

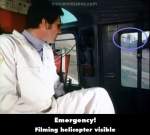
Visible crew/equipment: When Brackett's helicopter takes off the filming helicopter can be seen through the window. (00:03:45)
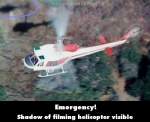
Visible crew/equipment: After landing at the base camp, when Brackett and the others walk away from Copter 10 we hear the comment, "The coffee's lousy but the food's great," then we get a bird's-eye view of the base camp, and can see the moving shadow of the filming helicopter at the lower right corner of the screen. (00:06:20)
Visible crew/equipment: After Engine 51 and Copter 10 are dispatched to the "traffic accident with injuries" Engine 51 is instructed to switch to frequency 3, and when Copter 10 takes off with Brackett, the moving shadow of the filming helicopter is visible near the shadow of Copter 10 chopper. (00:09:10)

Visible crew/equipment: While Brackett is on Copter 10, after the dispatcher tells the pilot that the truck driver has been heard on the CB saying that he's trapped in the cab, repeating the same location, when we see the bird's-eye view of Copter 10 flying below, the shadow of the filming helicopter is right beside the shadow of the Copter 10 chopper, at the top of the screen. (00:11:35)
Visible crew/equipment: During the fire late at night, after Johnny and Roy run to the burning house, when Captain Stanley tells Chet to get the exposure and later warns to watch for spot fires, the moving shadow of the cameraman/camera is visible on the ground, right beside Captain Stanley's shadow.
Visible crew/equipment: At the site of the vehicle accident, the outlines of the lavalier mic and cable are visible on the back of Roy's shirt, particularly when he's with Eddie as his father's being taken in Copter 10 to Rampart.
Visible crew/equipment: After Captain Stanley and Roy get the trucker out of the wrecked cab, when Stanley takes his pulse, the outlines of the lav mic transmitter and wire is visible on the back of his shirt.
The Girl on the Balance Beam - S5-E18
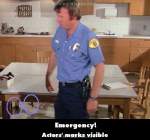
Visible crew/equipment: When Brackett and Morton go to the outdoor eating area to speak with Nancy's father, just as Brackett sits down and crosses his legs, the actor's T-mark is visible on the floor in front of his chair.
The Girl on the Balance Beam - S5-E18
Visible crew/equipment: When Johnny talks to Morton about the young gymnast and the responsibility of coaches and parents, the outline of the mic transmitter is visible on the left side of Johnny's shirt.
The Girl on the Balance Beam - S5-E18
Visible crew/equipment: While en route to the woman trapped on a wire, the reflection of the cameraman is visible on the windshield after Mike drives past the entrance to Commercial Studios. We see it's not Captain Stanley, but instead it's someone wearing a white shirt, holding up something (presumably the camera) with both hands.
The Girl on the Balance Beam - S5-E18
Visible crew/equipment: At the gym, when Nancy wants to prove that she's feeling fine, she tries to do a cartwheel, and the outlines of the mic transmitter and wire are visible on the back of her leotard.
The Girl on the Balance Beam - S5-E18
Visible crew/equipment: When the ambulance arrives at the scene of the drunk driver's car accident, and then when the drunk man is loaded into the ambulance, the reflection of the location set lighting is visible on the window, at the side of the ambulance.
The Girl on the Balance Beam - S5-E18
Visible crew/equipment: When Roy and Johnny are with the young gymnast, the outlines of the mic transmitter and wire are visible on the left side of Roy's shirt, as he takes her vitals and places the oxygen mask on her face.
Involvement - S5-E19
Visible crew/equipment: On scene at the accident with the tanker carrying liquid hydrogen, after Chet extinguishes the fire that ignited on Johnny's back, when the fire spreads and the car explodes, the car falls onto its side and the FX stunt platform that the car was resting on becomes visible. Then two shots later that platform has vanished, as they hose down the fire.
Above and Beyond... Nearly - S5-E20
Visible crew/equipment: In the dental clinic, when the possible MI is being examined, two actors' black tape marks become visible under the patient's chair, one below the footrest and another below the headrest.
Above and Beyond... Nearly - S5-E20
Visible crew/equipment: When Johnny and Roy get back to the station, and Captain Stanley tells them to come into the office where Chief Houts is waiting, the reflection of numerous set lighting can be seen on the squad's chrome spotlight.
Visible crew/equipment: When the dispatcher tells Copter 10 to meet Squad 51 at the five mile mark, Copter 10 lifts off, and we can see the moving shadow of the filming helicopter near the shadow of Copter 10.
Visible crew/equipment: After Station 51 is dispatched to the possible heart attack, when they arrive at the scene it cuts to the interior shot of the pregnant woman walking to the door, and we can see the shadow of the cameraman moving across the lamp and curtains.

Visible crew/equipment: When the guys are looking at the vitamins that Chet brought for them 51's tones drop, and as they leave the kitchen the two actors' T-marks are visible on the floor where Mike and Marco had been standing.


Answer: I believe you are speaking of the old man, Mr. Wilson. He's played by J. Pat O'Malley.
Bishop73
Correct, it was J. Pat O'Malley...he also played the grandfather with his grandson when their rocket exploded, and also played "Old Bill" in the episode with Ann Prentiss, where Gage saves the little girl from the burning tree house, and her mother falls in love with him.