Visible crew/equipment: When Johnny walks out of the ER, and finds out from Sally that Roy's been spreading advanced publicity about Johnny's 'modeling career', and then when Dr. Knott joins them, the outline of the mic transmitter is visible on the back of Roy's shirt.
Visible crew/equipment: When Dr. Knott comes back to the ER to see the tractor driver before he's discharged, he walks down the hallway with the nurse, and when he stops near Brackett he looks down at the actor's tape mark on the floor, then steps up to his mark. Then after Dr. Knott experiences chest pains, the two actor's marks in the two spots where Brackett had been standing, are visible on the floor as they walk to the treatment room.
Visible crew/equipment: When all the guys are on the roof trying to rescue the unconscious man on the scaffold, the outlines of the lav mic transmitters are visible on the backs of Johnny's and Captain Stanley's shirts, as well as the back of the other scaffold worker's shirt.
Visible crew/equipment: When Johnny and Roy are trying to get the boy with Meniere's Syndrome out of the treehouse, the bulging outlines of the mic transmitters are visible on the backs of Deputy Pauling's, Roy's, and Johnny's shirts.
Visible crew/equipment: When Morton is talking with the fireman's widow, DeSoto tells Morton that Early wants to see him, and when Morton walks through the door DeSoto's foot moves, and we see the actor's black tape mark on the floor by his foot.
Visible crew/equipment: After Brackett tells Jenny that they may have to put Koki down, Dixie walks into Jenny's isolation room, saying that they have the latest lab report, and the actor's tape mark is visible on the floor at Dixie's feet.
Peace Pipe - S2-E5
Visible crew/equipment: When Roy and Johnny are with the boy whose finger is stuck in the gumball machine, the outlines of the lavalier mic transmitters are visible on the backs of Johnny's and Roy's shirts.
Peace Pipe - S2-E5
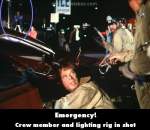
Visible crew/equipment: Just after the drunk driver is loaded onto the ambulance, when Roy tells Johnny about Debbie's pulse and respiration, and that she's in bad shape, then also when Roy tells Captain Stanley to make it quick, a crew member sitting atop a ladder with set lighting beside him are visible in the background.
Visible crew/equipment: When Roy and Johnny are with the nun, and Chet is helping with the kids on the school bus, the bulging outlines of the mic transmitters and wires are visible on the backs of all their shirts.
Visible crew/equipment: When the burned man is wheeled down the hall in Rampart shouting, "I'll sue you too," the actor's black tape mark is visible on the floor between Brackett and Johnny, just before Early steps on his mark. Additionally, another tape mark was visible a moment earlier, where Early stood before walking over to Johnny and Brackett.

Visible crew/equipment: When Dixie looks for Sally to flush the patient's eyes, she finds her in the hallway, and there are two actors' tape marks on the floor in the waiting room, where Dixie and Mike, the patient's friend, will stand in a moment.
Visible crew/equipment: When Roy and Johnny are walking down the hallway at Rampart, Roy asks Dixie for some supplies, just before Johnny spots Sheila doing uncover work, the two white tape marks are visible on the floor just behind him.
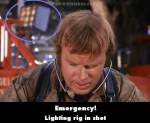
Visible crew/equipment: After John and Roy rescue the elderly man from the burning house, while Roy gets the man's vitals in the closeups, the large 12-light par bank rig is visible behind Roy at the left of the screen.
Visible crew/equipment: When Ed tackles with the possible OD at the car wash, the bulging outline of the mic transmitter is visible on the right side of Ed's shirt, above the belt. Then, when the man passes out, the outlines are visible on the sides of Roy's, Johnny's, and Ed's shirts. The mic transmitter's outline is also visible at the back of the deputy's shirt, when he hands Johnny the ID he found in the man's wallet.
Visible crew/equipment: When Roy, Johnny, and the trainee are with the injured man near the lighthouse, the outlines of the mic transmitters and wires are visible on the back, right sides of both Roy's and Johnny's shirts. It is also visible on the back of the trainee's shirt when they place the man in the Stokes.
Visible crew/equipment: At the morning lineup, when Captain Stanley walks out of his office the actor's small, black tape mark is visible on the floor where he stands.
Visible crew/equipment: After Johnny and the trainee run off to catch the purse snatchers, when Roy tells the officer which way they went, the outline of the mic transmitter is visible on the back of Roy's shirt.
Visible crew/equipment: While Roy's in the office making out the activity report for the training center, Johnny walks over to Ed who is standing beside the map, and when they're dispatched to the overdose, as they get into the squad we can see two tape marks (one white, one black) on the floor, where Johnny and Ed had been standing.
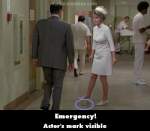
Visible crew/equipment: After Mr. Howarth confronts his son about the pills his daughter took, when Dixie walks up and tells him that he can see Monica, the actor's tape mark is visible on the floor, at Dixie's feet.
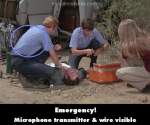
Visible crew/equipment: When Roy and Johnny are working on freeing the man trapped in the vehicle, and then when they are taking his vitals, the outlines of the mic transmitters and wires (running up toward their shoulders) are visible on the back of Roy's and Johnny's shirts. The mic transmitter's outline is also visible on the left side of Christy's sweater, below the waistline.
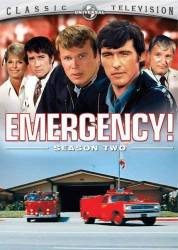


Answer: I believe you are speaking of the old man, Mr. Wilson. He's played by J. Pat O'Malley.
Bishop73
Correct, it was J. Pat O'Malley...he also played the grandfather with his grandson when their rocket exploded, and also played "Old Bill" in the episode with Ann Prentiss, where Gage saves the little girl from the burning tree house, and her mother falls in love with him.