The Puzzles Are Coming (1) - S2-E31
Visible crew/equipment: At the Knab Aircraft hangar Puzzler arrives in the truck just as Knab is leaving, and when Puzzler walks to the back of the truck the reflection of the boom mic is visible on the right back door windows. (00:14:45)
The Duo Is Slumming (2) - S2-E32
Visible crew/equipment: When Puzzler and his high-flying flunkies exit the shed it cuts to the Retsoor in Knab's hangar, and a few chalk T-marks become visible on the ground near the nose of the plane. (00:19:40)
The Catwoman Goeth (2) (a.k.a. A Stitch in Time) - S2-E34
Visible crew/equipment: When Alfred and Batman take off from the Batcave on the Alf-cycle (a nod to Batman's quick head-dip), it cuts to the exterior scene at the Run Down Factory. When the GCPD patrol car pulls up, in their closeup the movement of a crew member's reflection is visible on the triangle vent mirror, at the bottom left side of the screen. (00:10:30)
The Catwoman Goeth (2) (a.k.a. A Stitch in Time) - S2-E34
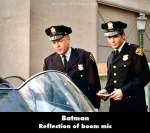
Visible crew/equipment: Outside the run down factory, when the GC police officers step out of their patrol car and walk over to the Batmobile, just as senior Officer Dietrich begins giving the rookie officer the what for, the reflection of the boom mic is visible on the Batmobile's left bubble windshield, at the left side of the screen. (00:10:50)
The Catwoman Goeth (2) (a.k.a. A Stitch in Time) - S2-E34
Visible crew/equipment: While Batman stands outside the run down factory, the GC rookie officer asks, "Who's Robin?" and both GC officers get back into their patrol car. Then as they drive away the reflection of equipment (looks like the boom pole) becomes visible on the vehicle's rear passenger window. Then it cuts to Batman, and the reflection of the boom pole is visible on the Batmobile's windshield, at the bottom right corner of the screen. (00:12:25)
The Contaminated Cowl (1) - S2-E35
Visible crew/equipment: When Mad Hatter has Batman's pink cowl he enjoys his short sweet victory. In the next shot the Dynamic Duo walk in, and at the end of this shot the actor's chalk mark is visible on the floor at Mad Hatter's feet. Then as the goons nab Robin and Batman, more chalk T-marks are visible on the floor. (00:22:45)
The Zodiac Crimes (1) - S2-E37
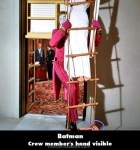
Visible crew/equipment: After Joker has stolen the map from Commissioner Gordon's office, he rushes to the window and calls for Venus, then just as Joker places his foot onto the lowest ladder rung, we can see a crew member's hand holding the same rung near Joker's foot, at the bottom of the screen. (00:02:05)

The Zodiac Crimes (1) - S2-E37
Visible crew/equipment: Bruce Wayne and Dick Grayson walk into the study alone when Bruce takes the Batphone call from Commissioner Gordon, then just as Bruce says, "The Joker again," at the top of the tuba bell we can see the reflection of a man wearing a white short-sleeved shirt and grey pants. Numerous studio lights are reflected as well. (00:03:15)
The Joker's Hard Times (2) - S2-E38
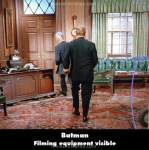
Visible crew/equipment: After Joker and his henchmen steal the statue, it cuts to Commissioner Gordon and Chief O'Hara as they recover from their shock paralysis, and when they walk over to Gordon's desk, the wheel of filming equipment is visible at the right side of the screen. (00:04:55)
The Penguin Declines (3) - S2-E39
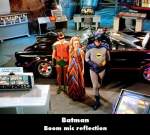
Visible crew/equipment: When Batman and Robin bring Venus to the Batcave, just as she says, "It's fabulous," the reflection of the moving boom pole/mic is visible on one of the Bat-computer screens, at the bottom right corner of the screen. As this shot continues, when Robin points out their Bat-radar, a chalk T-mark is visible on the floor near Batman's foot. Then, when Penguin, Joker, and the goons appear, more chalk T-marks are visible on their side of the floor. (00:17:10)

The Penguin Declines (3) - S2-E39
Visible crew/equipment: When Venus is at the Batcave, loads of fisticuffs ensue between the Caped Crusaders, Joker, Penguin and all the baddies. While Robin is up on the atomic pile scaffolding he punches one goon off the ladder, then as he falls we can see the edge of the brown crash mat rise up, right before the word "SPLATT!" appears onscreen. (00:20:50)
That Darn Catwoman (1) - S2-E40
Visible crew/equipment: When Pat Pending tells his valet, Rudy, that all his money is safer hidden in his mattress, Catwoman and her cohorts break in, then knock out Pending and Rudy. As Catwoman walks toward the bed there are two chalk marks visible on the floor, one of them at her feet. (00:17:20)
Scat, Darn Catwoman (2) - S2-E41
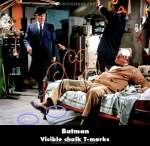
Visible crew/equipment: While Batman and Catwoman are at the Batcave the alarm goes off, so Batman activates the Diversionary Batphone Lines gadget, then it cuts to Pat Pending counting his cash, and when Commissioner Gordon and Chief O'Hara storm in, two chalk T-marks are visible on the floor near the bed. (00:12:30)
Scat, Darn Catwoman (2) - S2-E41
Visible crew/equipment: After Commissioner Gordon and Chief O'Hara arrest Pat Pending at his apartment, it cuts to the Batcave where Batman is writing a note to Alfred, and when Batman walks over to the Batmobile there are a few white chalk T-marks scattered on the floor. (00:13:45)
Penguin Is a Girl's Best Friend (1) - S2-E42
Visible crew/equipment: When Harriet, Alfred, and the others arrive at the studio while Batman and Robin are on set, the actor's curved white chalk mark is visible on the floor where Alfred stands. (00:12:10)
Penguin Is a Girl's Best Friend (1) - S2-E42
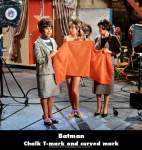
Visible crew/equipment: While Batman and Robin are at the studio, Harriet and the others from the Gotham City League of Film Decency confront Penguin about scene 12. When Harriet says, "This scene is bursting with other things as well," there's a shot facing Marsha with two other women, and we can see a curved chalk mark at Marsha's feet and a chalk T-mark at the other woman's feet. (00:13:20)
Penguin Sets a Trend (2) - S2-E43
Visible crew/equipment: The Batmobile, responding to Batman's remote control activator, is supposedly driving itself through Gotham City's streets. But in one shot, even though he's crouching down, you can see the head of the film crew member actually driving the car. (00:03:00)
Penguin's Disastrous End (3) - S2-E44
Visible crew/equipment: While Penguin and his bumpkins are hiding out in Aunt Hilda's cave, Hilda tells darling Pengy he's lucky that she's soft hearted, and the two curved chalk marks are visible on the floor where Marsha and Penguin will stand. (00:03:45)
Penguin's Disastrous End (3) - S2-E44
Visible crew/equipment: At the sub-treasury, when the guards hear the sound of Marsha's music they turn towards her distraction then move closer, and curved white chalk marks are visible on the floor where the actors will stand, in this shot and a following shot. (00:07:20)
Penguin's Disastrous End (3) - S2-E44
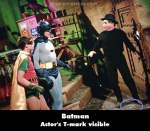
Visible crew/equipment: When the Dynamic Duo follow the lizard trail and go down into the manhole they end up in Hilda's cave, and when they approach Penguin's goon standing by a door, there are two chalk T-marks on the floor near that door. (00:08:50)


Answer: There were three well-known actors who played Mr. Freeze, each one a different height, weight, and physique. As these were notable guest stars, the costume designers would adapt the costume to best fit each actor who likely would want to avoid comparisons to the other Mr. Freezes, incorporate their preferences, as well as refresh the look, rework whatever didn't work in previous versions, and so on.
raywest ★