Relativity - S3-E10
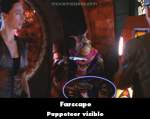
Visible crew/equipment: When Stark and Aeryn are back aboard Talyn with Xhalax, who is tied up, when Stark says, "As far as I can tell, Talyn's systems are almost back to normal," we can see the puppeteer's face (wearing a weird black mask) and hands under Rygel's hoverchair.
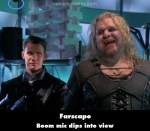
Visible crew/equipment: When Zhaan and Stark are at the bar, after Stark says, "That's just about the last of the DRDs. If Crichton's correct, they should give us some indication of where the signal's coming from," the boom mic dips into view at the top of the screen.
Self-Inflicted Wounds (2): Wait for the Wheel - S3-E4
Visible crew/equipment: While Aeryn and John are running in the corridor separately, when Aeryn and John meet in the corridor, just as she yells, "No, blocked! Outer hull rupture! Long way!" a crew member can be seen crouching at the right side of the screen.

Visible crew/equipment: After Chiana and Jothee lie to Rygel about a pot that exploded which caused the mess, it cuts to the room where Scorpius and his men are holed up while looking at a hologram map of the clinic, and in the first shot facing Grunchlk and Kobrin the boom mic dips into view at the top of the screen.
Relativity - S3-E10
Visible crew/equipment: When they are suggesting decoys to lure the Retrieval Squad, Stark questions the idea and Crichton says "Stark, if you have any other ideas we'll be thrilled to hear them before we go out". At the same time they are walking down a passage way with the camera following. As they turn the corner the camera's shadow can be seen on the wall to the left.
Visible crew/equipment: When they spot the moon, Aeryn walks to the control systems and says "How could we miss it?" If you watch closely you can see the boom mic come in to picture above her.
Visible crew/equipment: After Crais asks if Aeryn have seen the surveillance logs, it cuts to a close-up shot of Crichton. If you look closely up in the left corner of the screen you can see the boom mike pop into view.
Self-Inflicted Wounds (1): Could'a, Would'a, Should'a - S3-E3
Visible crew/equipment: While John, Zhaan, Neeyala, et al. Are trying to decide between Moya and the spiral ship, after Rygel snips, "You're both dying! And now you want to take us with you," when John throws the ball at Rygel we can see the puppeteer's fingers under Rygel's sleeve as the Hynerian raises his hands.
Visible crew/equipment: While Talyn is flying towards the sun and everyone's screaming Talyn's name, we can see the puppeteer's arm going up into Rygel's sleeve at the left side of the screen.

Visible crew/equipment: When Stark and Sierjna go to Talyn's rudimentary pilot's den, notice that Stark's vest has suddenly developed five randomly placed grommet openings, which will be where Talyn's wiring will attach when Talyn bonds with Stark. And when Stark-Pilot says, "Talyn you will turn away, you must turn away," there's boom movement at the right and left of the screen. Also, later when Stark-Pilot flies Talyn closer to the sun to rescue Sierjna, and once she reappears, there's a shot from behind Stark-Pilot and we can see the long rod (not Talyn's wiring) that's behind his right leg attached to his pants, which is part of the support equipment to have Stark-Pilot hover.


Chosen answer: It's never explained. John mentions a theory that his less technologically developed craft simply interferes with the wormhole less than the "superior" Vipers, but they never make a concrete determination on that point. But we also have to take into account the fact that Moya traverses wormholes with no ill effect as well.
Garlonuss ★