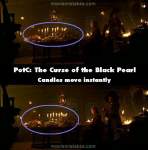
Continuity mistake: Barbossa says, "Buried on an island of the dead what cannot be found, except for those who know where it is." In this shot only the objects in the center of the table slide down towards Elizabeth, including the two candelabras and her plate of food, having nothing to do with the object's weight. The objects that face Elizabeth on the table to her left and to her right don't move, only those on the moving center track. Also seen on DVD 2. (00:56:45)

Revealing mistake: When the gallows, in the Fort's courtyard, blows up, just before the huge explosion, four of the platform legs can be seen exploding in the same place, at the same time. A horse and rider pass by in the wide shot, another platform leg, the arm of the gallows and the actual platform explode in sync. Also, in the next close-up we see where the nearest leg of the platform has been cut to help facilitate the explosions impact. (00:31:25)
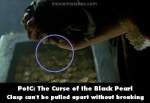
Revealing mistake: The clasp closure on the medallion's chain is NOT the sort that just comes apart when yanked on, evident in the many close-ups of the clasp throughout the film. Yet there are a number of scenes in which the chain is just pulled and it comes off easily: Elizabeth pulls it off aboard the Pearl, to barter with; Barbossa pulls it off, during her blood ritual; Elizabeth pulls it off to give to Will, aboard the Interceptor... The chain was secured to her neck with sellotape, in order for it to come off quickly for the shots. (01:12:15 - 01:19:28)
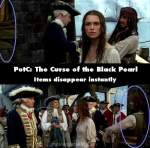
Continuity mistake: When Gillette puts the iron shackles on Jack, as Elizabeth offers her protest, in the shots facing them, there is a barrel with a green sack on top of it and two wicker rods against the stone wall. However, when Norrington says, "Indeed," then when Jack says, "Finally," and also when Jack says, "I saved your life. You save mine. We're square," the barrel, sack and rods are not there. (00:18:25)
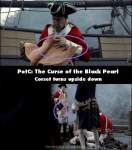
Continuity mistake: After Jack rescues Elizabeth, he slices the front ties of the corset she is wearing, and gives the corset to Murtogg. As he hands Murtogg the corset in the first shot, the corset is right side up, because we see the waist flaps at the bottom. In the next shot, as Jack's hand lets go of the corset Murtogg is seen holding the corset upside down with the shoulder straps at the bottom. In the next shot, a close-up of Jack, in the background Murtogg is holding the corset right side up, and the waist flap is seen. (00:16:35)
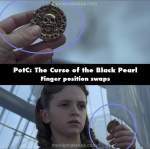
Continuity mistake: When young Elizabeth holds up the medallion, and she sees the Black Pearl, her fingers are positioned differently in the wide shot and in the close-up shot of the medallion. (00:04:40)
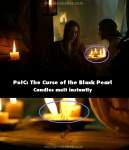
Continuity mistake: Aboard Interceptor, Will and Elizabeth are below deck, and seen on the table are candles on a plate. The three candles and the melted wax on the plate to the right of Will's elbow, differ in the opening shot, when Will says, "Here let me," and when he has the medallion and slams it down onto the table. The candles do not melt so quickly, while they have this very short conversation. (01:17:35)
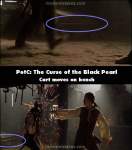
Continuity mistake: At the blacksmith shop, one end of the cart that Jack and Will duel on later is resting on a wood bench. In the close-up shot of their feet, just before Jack says, "Ta," the edge of the cart is flush against the edge of the bench. In the wide shots, before and after, the edge of the cart is in the middle of the bench. This has nothing to do with the angle of the camera. (00:23:10)
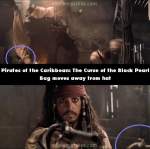
Continuity mistake: When Jack sprays Will with the soot from the sack and kicks away Will's sword, he drops down the sack of soot onto his hat sitting on the fireplace. In the next shot, from behind Will's back, the sack of soot is not on Jack's hat, but way behind it. (00:26:20)
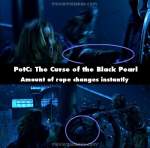
Continuity mistake: On the Black Pearl, just before Elizabeth spins the wheel on deck and knock's off Grapple's skeletal head, when she first approaches the wheel, it is fully wound up with rope. As she starts to spin the wheel, there are only about five lines of wound rope, next to the wheel. (00:59:25)

Revealing mistake: When Jack rescues an unconscious Elizabeth, as he reaches to lift her, his wet white shirt is translucent. From just above the elbow we can see the pink of his skin showing through the sleeves, but above that it's very apparent that he is wearing another garment under the white shirt. Yet when he's on the dock, there is no other garment under his shirt, which is still translucent enough to see the two tattoos on each of his shoulders. (00:16:00)
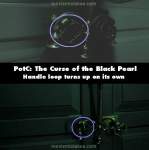
Continuity mistake: When Elizabeth puts the silver candelabra upside down on the door handles, the left handle is hanging down. In the next shot, that door handle is sticking straight out. No one touched it. (00:33:20)
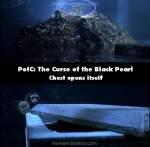
Continuity mistake: After the credits, Barbossa is shown lying on the treasure pile. The Aztec chest is up at the top and the lid is closed and straight. (It was also shown with the closed lid when Jack asked Will to drop him off at his ship.) Then, in the last shot, when the monkey jumps up onto the chest, the lid is on the Aztec chest, but it is partially open now. (02:22:10)
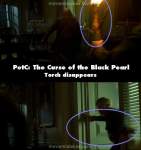
Continuity mistake: When Pintel and Ragetti go after Elizabeth in her home she knocks Pintel out cold and drops hot coals from the bed warmer on top of Ragetti's head. In the close-up as Ragetti yells, "No! No! It's hot!" he holds the flaming torch in his left hand. However, in the next shot as Pintel yells, "Come on!" the torch is gone, it is in neither of Ragetti's hands and of course when he leaps over the banister he has the torch again. (00:32:50)
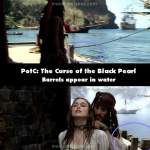
Continuity mistake: On the dock at Port Royal, Jack is speaking with Murtogg and Mullroy, who are guarding the dock from civilians. Seen behind the Marines to their left is the vacant dock edge. Yet when Jack holds Elizabeth hostage, the same dock edge is seen, but in this shot the edge is now filled with barrels and sacks. No one was on the dock between these two scenes. (00:11:45 - 00:18:40)
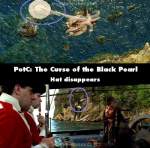
Continuity mistake: When Elizabeth faints and is falling into the water after Norrington's proposal, there's a shot of her from on the rock. You can see her hat and scarf falling right after. But when the shot moves to Jack and the two guards on the ship, Elizabeth is falling and there is nothing above her - where are the hat and the scarf? There is plenty of time to see the hat and scarf fall too, if they were actually included in the shot, but they simply weren't. (00:15:00)
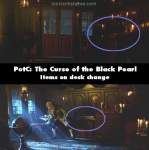
Continuity mistake: Aboard Dauntless, Governor Swann is talking to Elizabeth through the closed doors. As he says, "I couldn't be more proud of you," the table is shown being right next to the dresser and the table is devoid of any rolled papers. When Governor Swann is battling with the skeletal hand, Not only does the table have rolled white paper on it now, there are two large trunks, between the table and dresser now, and more rolled paper. (01:49:45 - 01:56:15)

Revealing mistake: When Jack and Elizabeth are marooned on the island, Jack wants to know why the rum is gone. Elizabeth sits down in front of Jack, and as he stands behind her, he puts his fists up to his chin in frustration. His right forearm does not have the sun and sparrow tattoo showing, although part of it should be. The entire tattoo would not be hidden under his sleeve, makeup simply did not apply it for this shot. (01:39:20)
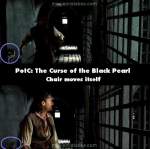
Continuity mistake: Will runs down the stairs towards Jack's jail cell. At the bottom of the steps there is a desk and chair. When he first comes down, the chair is pushed into the corner of the desk. As Will says, "These are half pin barrel hinges," behind him, the chair is now pulled out. Will then uses that chair to balance the bench for "the right leverage to lift the door free." (00:42:25)
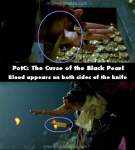
Revealing mistake: In the close-up of Barbossa cutting Elizabeth's hand, we see as the blade goes across Elizabeth's palm, leaving an obvious thin red line where the blade sliced, but not leaving blood on the blade as it slices. The creases in her palm are also unaffected by the 'cut' that's being made. Yet when Barbossa holds the blade up to his face, the blade now has a good amount of blood on both sides. (01:12:00)


Answer: On Disc 3, Johnny explains, "Take something as solid as Keith Richards and combine it with Pepé Le Pew... I felt... he would resemble a modern day Rastafarian..." Pepé Le Pew is a Looney Tunes cartoon character, based on Charles Boyer's romantic character, Pepé Le Moko. Pepé Le Pew, however, is a romantic amorous cartoon skunk and he has a huge flaw - his 'odor', which he emits in a grand way.
Super Grover ★