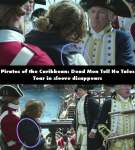
Continuity mistake: Near the beginning of the movie, when the young adult Henry attempts to stop the British Captain from sailing into the triangle, Henry is subdued by the Marines. The British Captain accuses him of treason and rips both of Henry's sleeves down from the shoulders. The next camera view is from slightly further back as the British Captain commands the Marines to take Henry below and Henry's sleeves are still intact.
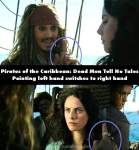
Continuity mistake: After Carina tells Jack and the others that she's an astronomer which has nothing to do with donkeys, when Jack threatens to kill Henry in the shot facing him he's holding his left hand up pointing at Henry, but in the next shot facing Henry it's Jack's right hand up pointing at Henry.
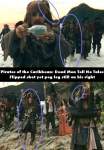
Continuity mistake: After Barbossa releases the Black Pearl to her former and rightful glory, when it cuts to Jack and the others running on the beach the closeup and next long shot are flipped shots. Note that even though they're flipped shots Barbossa still has a right wooden leg, thanks to the CGI. (01:23:30)

Continuity mistake: After Jack uses his spyglass to watch Will and Elizabeth reunite, when it cuts to Gibbs shouting, "Make way, Captain Jack Sparrow on deck," the shot of Gibbs and also the next six shots are all flipped shots, until Jack reaches the helm. In the first two flipped shots of Jack the beads and bone that are at the top of his head have been digitally altered to the right side of his head so the shots appear normal, but everything else is backwards.

Continuity mistake: When the sharks attack Jack and Henry's rowboat, one bites a chunk of the stern and the hammerhead bites a chunk of the bow. In following shots the bow bite vanishes as the shark leaps over Jack and Henry when it lands in the water, and the damage at the stern not only changes, but it also vanishes when the shark imitates Bruce from Jaws and lands on the boat.
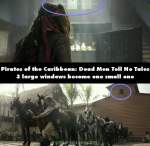
Continuity mistake: When we see Jack inside the bank with the vault, there are three windows in the wall at the back of the room, but when the back of the building is seen with the pirates and horses, there is only one small window high up on the wall. (00:16:45)
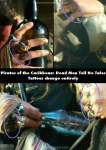
Continuity mistake: Jack's knuckle tattoos on his right hand read "Jack" and the knuckle tattoos on his left hand read "Jakc" with the "k" at his ring finger and the "c" at his pinky. The ink intensity and letter style of his tattoos keep changing, and during the scene in the bank the "c" and "k" tattoos on his left hand have switched places, with the "c" at his ring finger and the "k" at his pinky.

Revealing mistake: When Jack stumbles out of the vault he questions the crowd as to why he's there, and as he holds up his left hand we see the tattoos on his knuckles, but when Jack says that he needs just a moment to clear his head, those knuckle tattoos on his left hand vanish and a ring appears out of nowhere. Then the tattoos reappear and the ring vanishes.
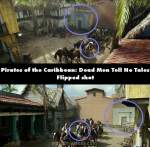
Revealing mistake: When the bank vault is hitched up to the team of horses note the position of Marty's white horse, and the buildings around the bank, because two of the following wideshots are flipped. First, after the ropes get taught when it starts pulling the vault, the shot of the team is flipped; and second, after Jack gets on his knees just as the bank moves around him, once again the shot of the team is flipped.
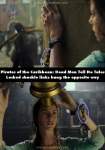
Continuity mistake: When Carina escapes from her jail cell, just after we hear Mayor Dix dedicate the Royal Bank of St. Martin, in the closeup we see the locked shackle around Carina's left wrist and the hanging links with the other shackle dangling. Then when Mr. Swift sees Carina handling his telescope, in this closeup we see the shackle links are hanging the opposite way, revealing that the locked shackle around her left wrist had been the dangling shackle from the earlier shot.

Continuity mistake: On the guillotine platform, when they strap Jack to the bench which will support his body, we see the double prong buckle is attached to the short leather strap beside Jack's right arm, and they slide the long strap with holes through the buckle frame. However, in following shots when Jack is on the ground the double prong buckle is actually attached to the long strap, and it's the short strap with holes positioned within the buckle frame.
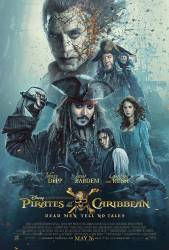


Answer: There was never any explanation other than Elizabeth kept it in the chest. As both the Elizabeth and Will characters are rumored to return in POTC 6, the question may be answered in that installment.
raywest ★