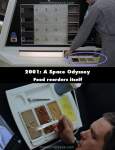
Continuity mistake: When Dave gets his supper, the order of the slop from right to left is yellow, light brown, light brown, dark brown. Later when he's eating, the order is yellow, orange brown, dark brown, light brown. (00:59:00 - 00:59:50)
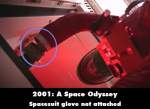
Continuity mistake: After David Bowman returns to Discovery One, HAL disables all life support systems in order to protect "himself" from being shut off. But Bowman successfully enters the ship, grab a helmet and goes to the Logic Center, to shut down HAL by disabling the Memory Banks. But, when opening the hatch to enter the Memory Bank, you can see his naked left wrist, for the spacesuit and the glove are disconnected. (01:51:10)
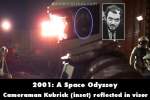
Visible crew/equipment: When the astronauts are approaching the monolith on the moon, you can see the reflection of the cameraman in the visor of the first astronaut off the ramp, in the close up of him walking around the monolith. This shot was personally filmed by Stanley Kubrick and the reflection is his own. (00:48:40)

Deliberate mistake: When Dave is in the pod arguing with Hal to let him back in, various patterns of light are projected on Dave's face presumably from the video screens that say NAV and COM and such. Light on such a screen would diffuse and not project like this. It is likely those screens had rear projection and they merely removed the screens for this effect.
Continuity mistake: When Dave begins to disconnect HAL's circuits, one angle shows him unlock the first, second, then third unit. Just as he's about to remove the key from the third lock, the angle changes and he's pulling the key from the second lock and then goes for the third again. We know this is consecutive time as HAL is pleading with Dave the entire time. (01:51:45)

Visible crew/equipment: When David walks with the case in the hand inside the Discovery One, you can see the dolly track below at David's feet blending in the structure. (01:12:12)

Continuity mistake: When Frank Poole and Dave Bowman are discussing with HAL the possibility of HAL being in error predicting the AE-35 Unit fault, the 10x3 grid of buttons on the console in front of them is lit differently depending on whether the shot is from behind the men, or in front of them. (01:20:40 - 01:23:00)


Answer: The ultimate goal was to orbit Jupiter to study the Monolith also in orbit around it.
Grumpy Scot